


Build an E-Commerce Website Without Coding
A step-by-step Onnomatra guide to creating a store, choosing a template, setting up payments and delivery, and publishing your site.
Sakib Al H.
Head of Growth, Onnomatra

If you sell through Facebook, you probably spend a lot of time answering the same questions about prices, sizes, and delivery. A store gives shoppers one place to see those details and order, even when you’re away from your inbox.
This guide walks you through creating a store with the Onnomatra page builder, from the first template to your first test order.

Why use Onnomatra?
A visual builder lets you edit your page and preview it as a shopper would see it. Start with a layout and change the photos, text, and sections as you go. For a campaign with one product, a focused landing page may be enough. For a wider catalog, start with a full store.
| Task | What you can do in Onnomatra |
|---|---|
| Design | Start with a template and edit it visually. |
| Orders | Collect order details at checkout and review them in the dashboard. |
| Mobile preview | Check the layout on a smaller screen before publishing. |
1. Create your account
- Open the Onnomatra dashboard.
- Create an account and follow the setup prompts to create your store.
- Choose a store name customers can recognize and remember.
Check the plans and pricing page for current publishing limits and feature availability.
2. Choose a template
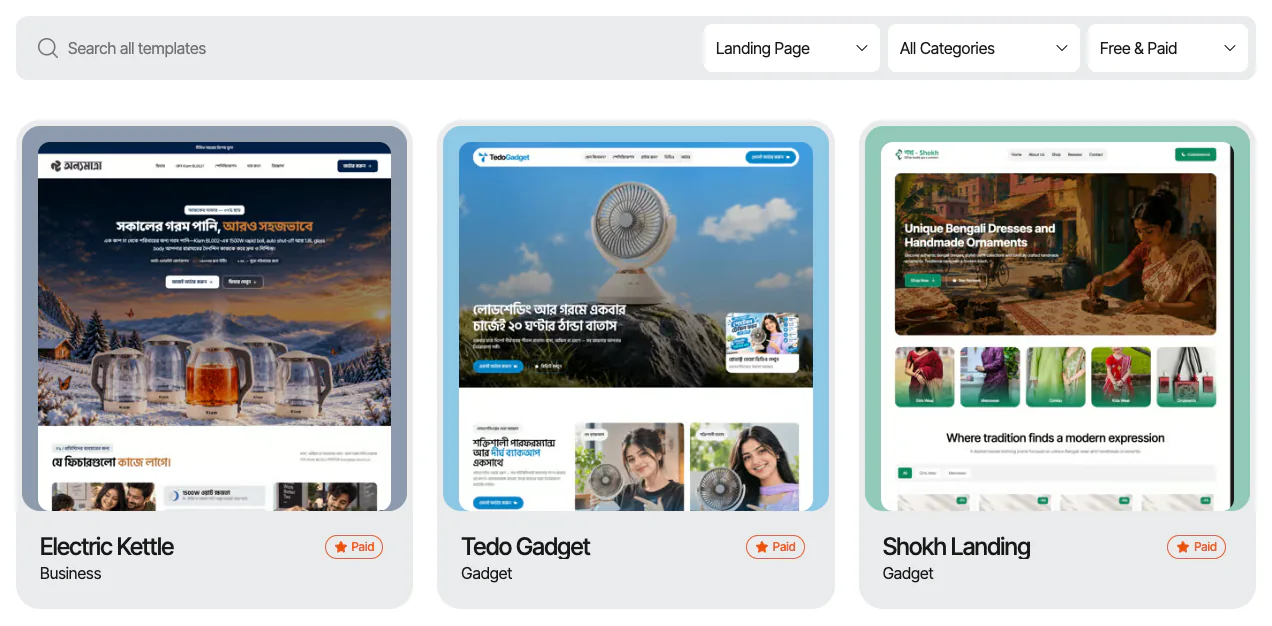
Open the template library and preview a design that fits how you sell:
- Fashion: Pick a layout with room for multiple photos, sizing information, and color options.
- Food: Make ingredients, pack sizes, delivery details, and storage instructions easy to find.
- Gadgets: Give specifications, warranty details, and product demos their own space.
- Single product: Use a focused landing page with a clear order button.

3. Customize the page
In the builder, add or reorder sections with drag and drop. Put the product name, a clear photo, and the main order button near the top. Add product details and genuine customer feedback where they help shoppers decide.
Preview the page on desktop and mobile. On a phone, check whether the text is readable, the order button is easy to tap, and the most useful details are visible without a long scroll.
4. Set up payments
Open your store’s payment settings and enable the methods you can accept. If you offer cash on delivery, make the delivery charge and any conditions visible before the customer confirms the order. For online payments such as bKash, use the options available in your dashboard and complete the provider setup.
Place a test order and verify that the amount, delivery charge, and payment status appear as expected.
5. Set up delivery
Set delivery zones and charges for the locations you serve. If you use a courier such as Pathao or Steadfast, check the courier settings in your dashboard and follow the setup for the available integration.
Test the workflow from checkout to the order dashboard. Make sure the address, phone number, and delivery charge are all present before dispatching a real order.
6. Connect a domain and publish
If you own a domain, follow the DNS instructions in your store settings and verify the connection before sharing the address. You can also use the store URL assigned to your project.
Publish the site when you’re ready, then open it in a private browser window. Check the product page and checkout from a customer’s perspective.

Three ways to improve sales
- Show the product in use. A clear photo or short demo answers questions a list of specs may leave open.
- Make the total easy to find. Show the price, delivery charge, and relevant return terms before checkout.
- Reduce friction on mobile. Keep the order button easy to reach and ask only for the information you need to fulfill the order.
